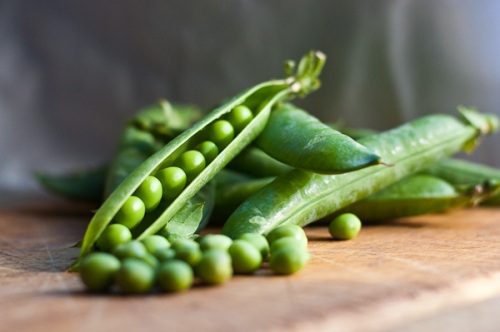
I wish I could say that I grew up shelling peas with my mother. That I would burst those crisp, green pods and scoop out perfect little green orbs with nimble digits that seemed designed just for the task. But no. We grew up with frozen peas as a staple in our kitchen. My mother would use them as a go-to when she would whip up a quick dinner of fried rice or spiced corn beef.
I would probably be happy sticking with the frozen variety – after all, they’re convenient, nutrient-rich, and tasty, if I hadn’t decided to buy a bagful of Garden (also known as English) peas from Manhattan’s Union Square farmer’s market 3 years ago. I discovered what a real treat it is to enjoy the freshest peas newly emerged from their jackets. Sure, they bore a resemblance to their frozen cousins, but the sweetness and pure “pea” flavor seemed magnified to the zenith.
Unlike my lucky co-writer Charity, I don’t have the outdoor space to grow peas in my corner of the West Village, so for now, the farmer’s market is my back garden. I admit I still have frozen peas in my freezer for those last-minute supper emergencies. But, if I want to impress friends with a bright pea soup, or a creamy pea-spiked risotto, or just indulge in a seasonal treasure with a simple dish of braised peas and lettuce, I head back to Union Square.
With ample experience of shelling and prepping peas now under my belt, here are my top tips. I’m not going to lie to you, if you’ve got a pea dish on the menu for a dinner party of 6 or 8, all that shelling is going to be tiresome work. But, here’s the secret: arm yourself with a comfy chair, something cool and delicious to sip on, put on your favorite tunes and think about all those things you’ve been meaning to think about, before life got in the way.
Choosing, Picking & Buying
My big mistake is that I reach for the largest, plumpest pods thinking they hold the tastiest peas. WRONG – don’t let your eyes be ruled by your belly (I know, its harder said than done). These more mature specimens are inferior even to frozen peas. The peas inside will be a dull green hue, they’ll be tough and it’ll take considerable cooking time to make their denser texture palatable. The younger, smaller pods actually contain the sweetest, most tender loot. If you’re buying from a farmer’s market, check to see if you’re at the right vendor by popping one open there and then. If you find small, bright green spheres, you’ve hit the jackpot.
If you’re harvesting your own, once the peas are gently rounded, and starting to fill out nicely, you should be picking them every 2 to 3 days over a period of up to 10 days. To pick, simply hold the pea vine with one hand and pull off the pods with the other. Be gentle, as the vines can be brittle and you don’t want to damage them. Here’s a good tip to remember to maximize your harvest: Always remove – and discard – the overmature pods, as leaving them on the vines will decrease your overall yield.
Popping those pods…
You want to shell your peas as quickly as you can after you pick them or buy them, as they start to deteriorate nutritionally and flavor wise as soon as they are off the vine. Sprint if you have to, as your stash is losing precious sweetness by the minute! And keep them as cool as you can, they really don’t appreciate sweltering in a humid, brown paper bag.
1. First off, rinse the pods under cold, running water to remove any dirt and dry with kitchen paper. Since the peas inside are in a sterile environment until you release them, you don’t need to wash them once shelled.
2. Break off the stem from the pod, pulling off the stringy fiber from the seam that runs down the length of the pod (it should come off with the stem). Pry the pod open with your fingers, then, holding it over a large, deep bowl, run your thumb along the side of the pod and loosen the peas so that they fall into the bowl. Another method is to squeeze the pod on both ends to burst the seam, then remove the peas as above.
Storing Shelled Peas – Use now, or freeze for later
If you’re a procrastinator, you and peas are not likely going to be best friends. But, if you want to enjoy them at their best, this is a battle you’re going to have to concede. Still you have a choice, cook them immediately in whatever dish you have your eye one, or blanch them in boiling, lightly salted water for a couple of minutes, throw into a bowl of ice cold water, and then drain and freeze in zip-lock bags, until ready to use. They should keep for about 6 months in the freezer.
Classic Pea Pairings
- Prosciutto, bacon and ham
- Mint, basil, tarragoin and chives
- Asparagus, baby potatoes and scallions
- Salmon, white fish and shellfish
- Lamb and chicken
- A quick saute with a splash of water or vegetable broth until just tender
- Braise on top of a layer of Bibb lettuce in a covered saucepan with a little vegetable or light chicken broth, a pinch of salt and chopped herbs (try tarragon and mint) for about 5 to 10 minutes until tender. Stir in a little butter and lemon juice before serving.
- Toss into risottos, or pasta sauces during the final few minutes of cooking
- Cook down and puree into luscious, creamy soups with yogurt or creme fraiche