By Nadia Arumugam |

A Cure for Winter Ills: A Braise of Chicken, Shallots and White Wine

DSC_0413

Afflicted as I am with a croaky throat, and a hefty dose of seasonal malaise, I have been seeking solace in a number of ways. I have a veritable pharmacy of drugs at my disposal, but most notably, I have been feeding myself substantial portions of soothing soups, comforting stews, oh and of chocolate (usually first thing in the morning when it feels most decadent).

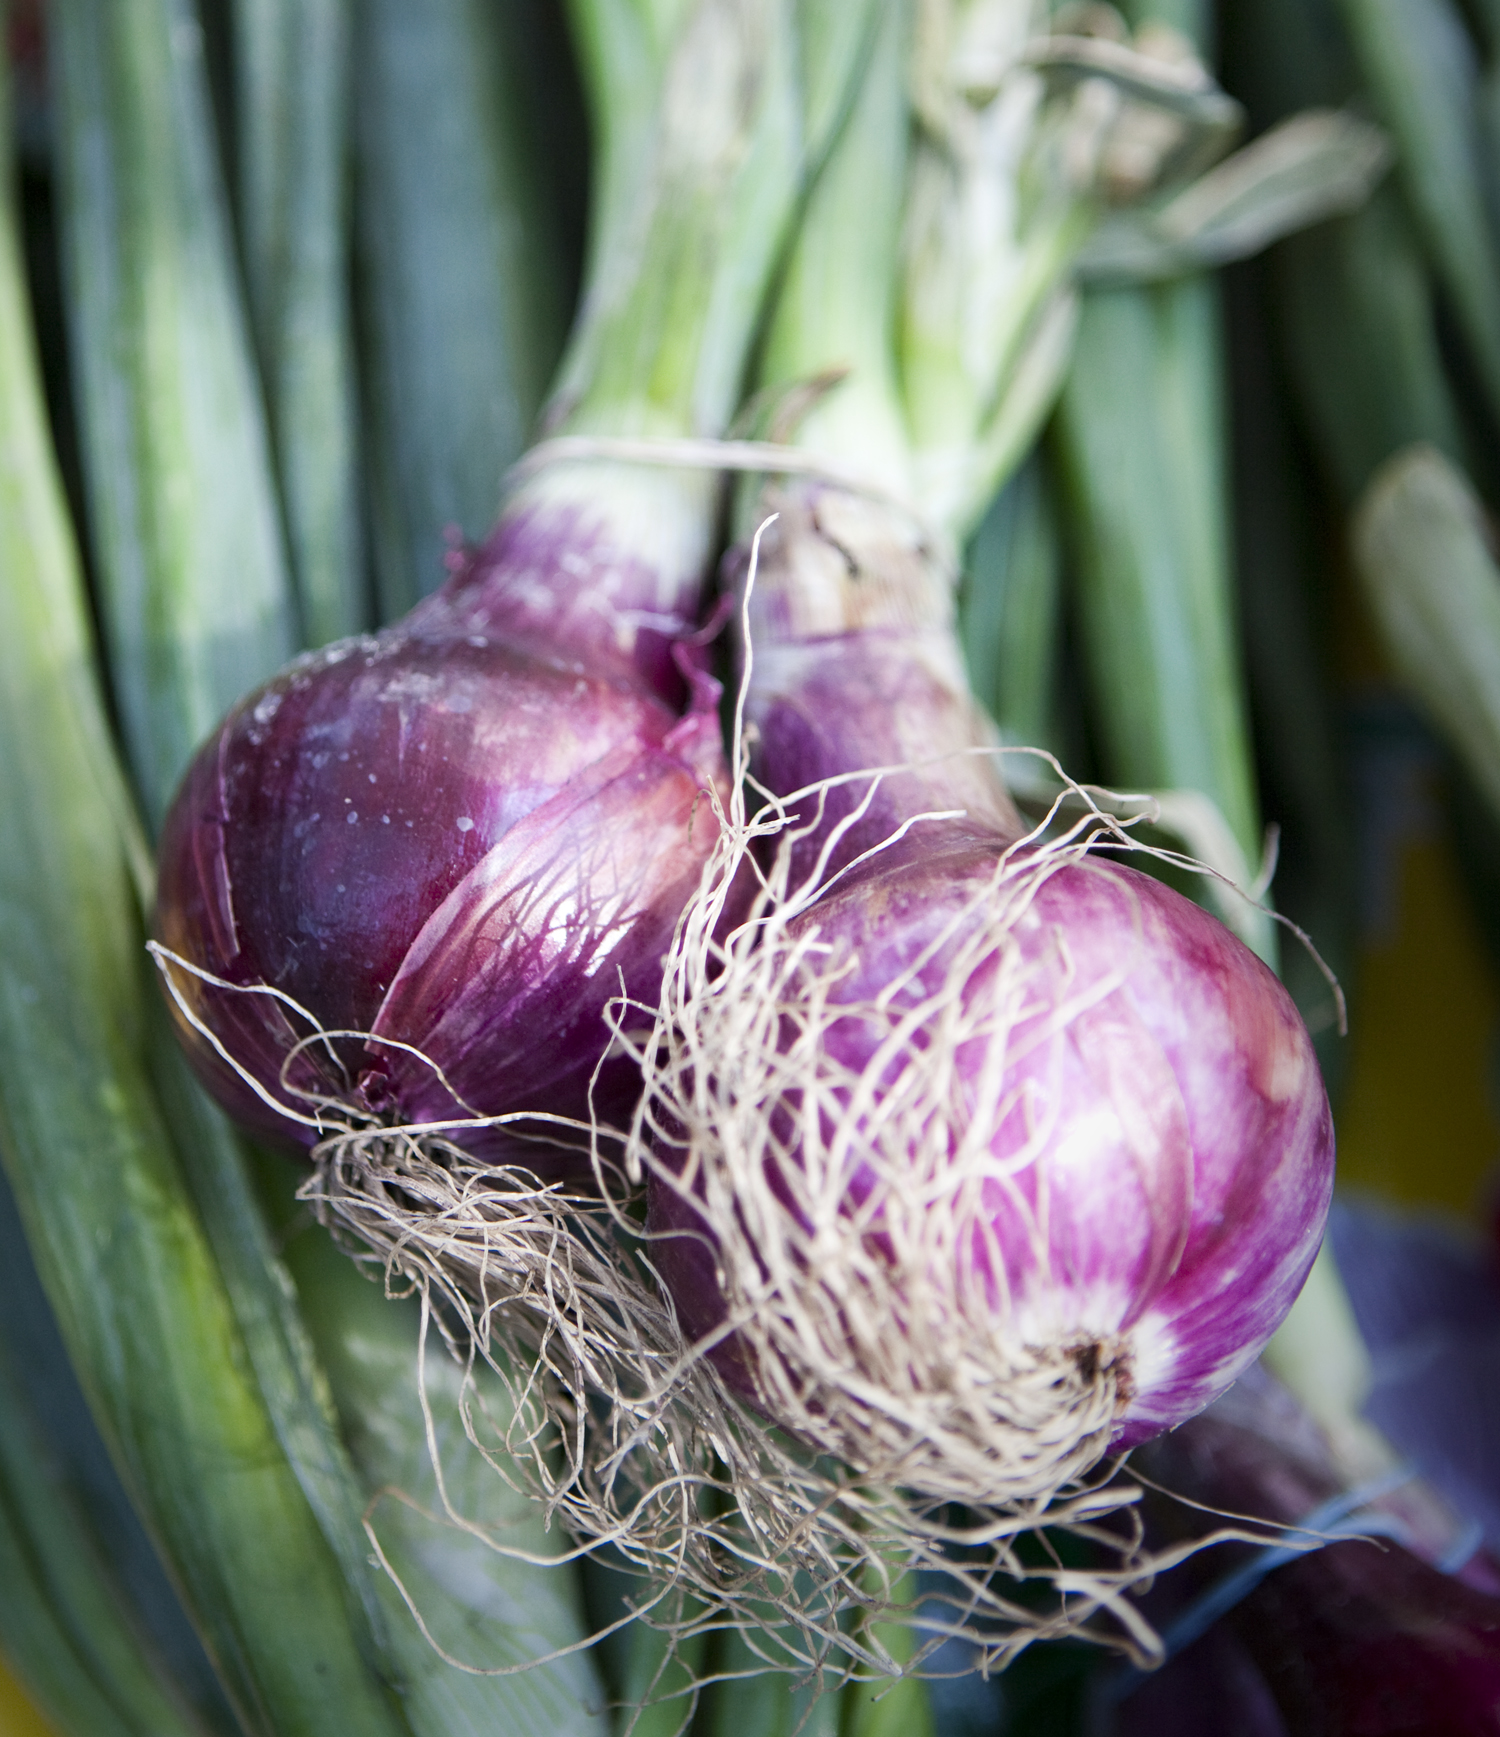
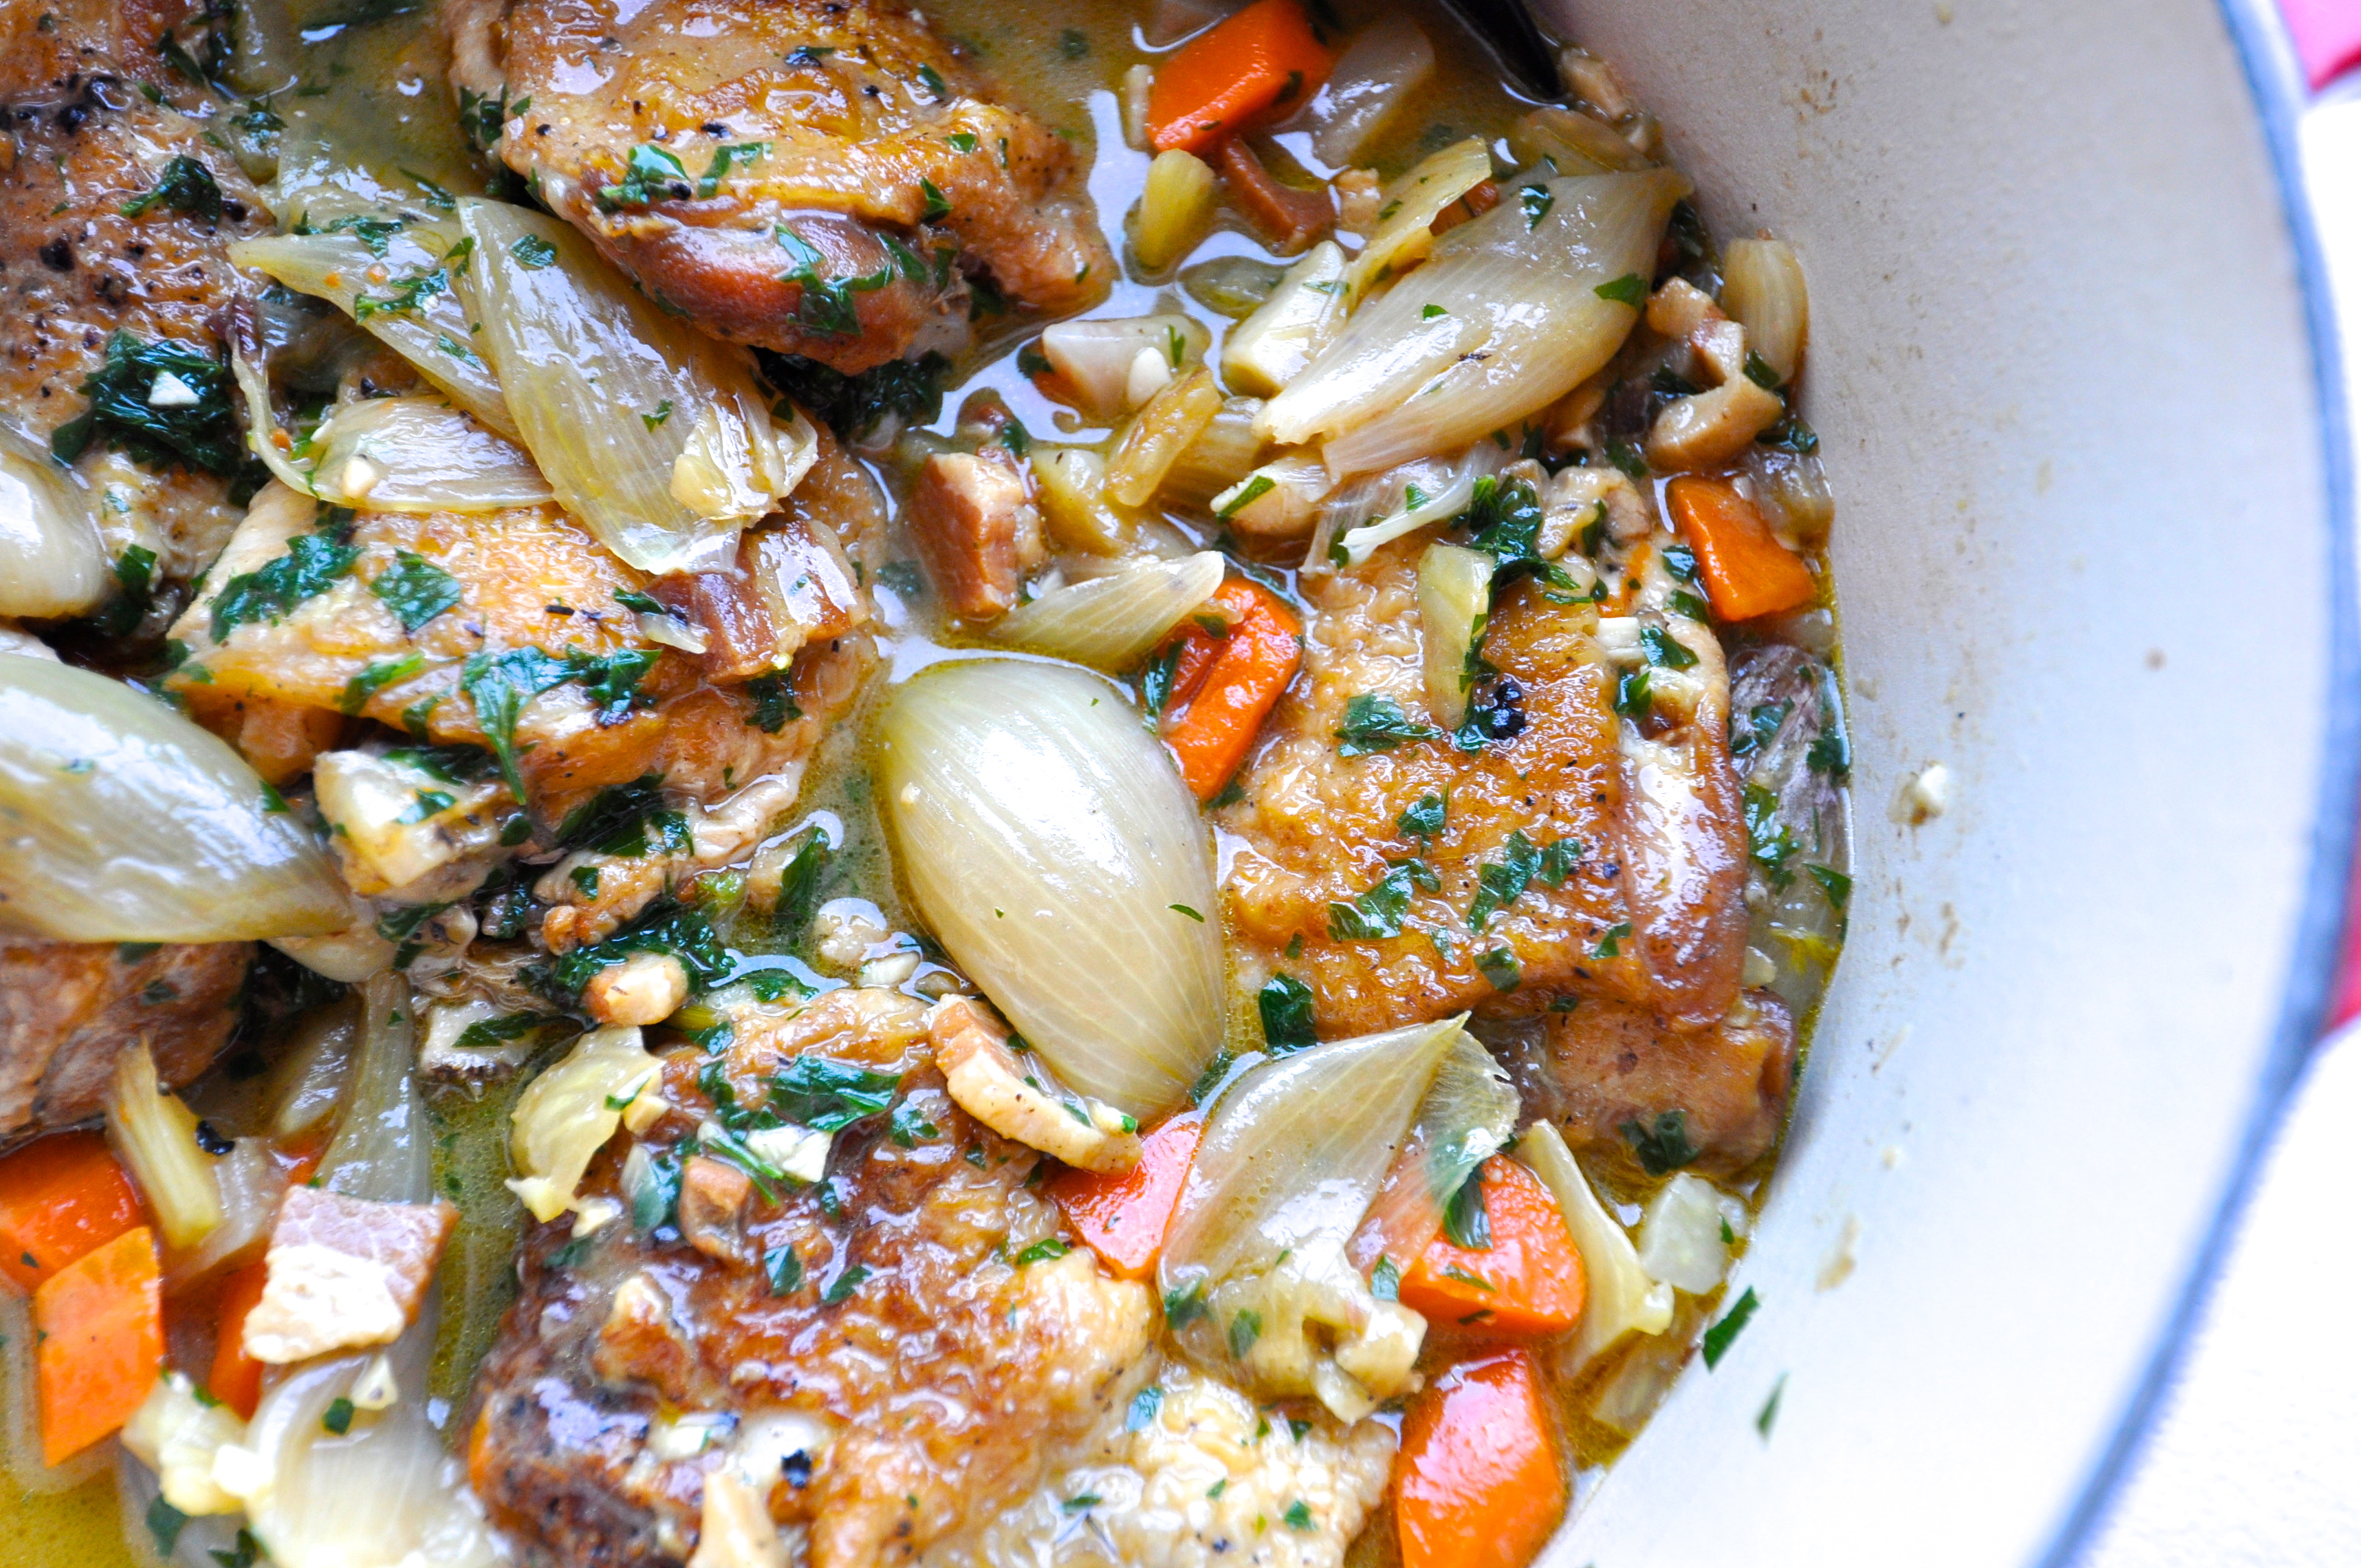
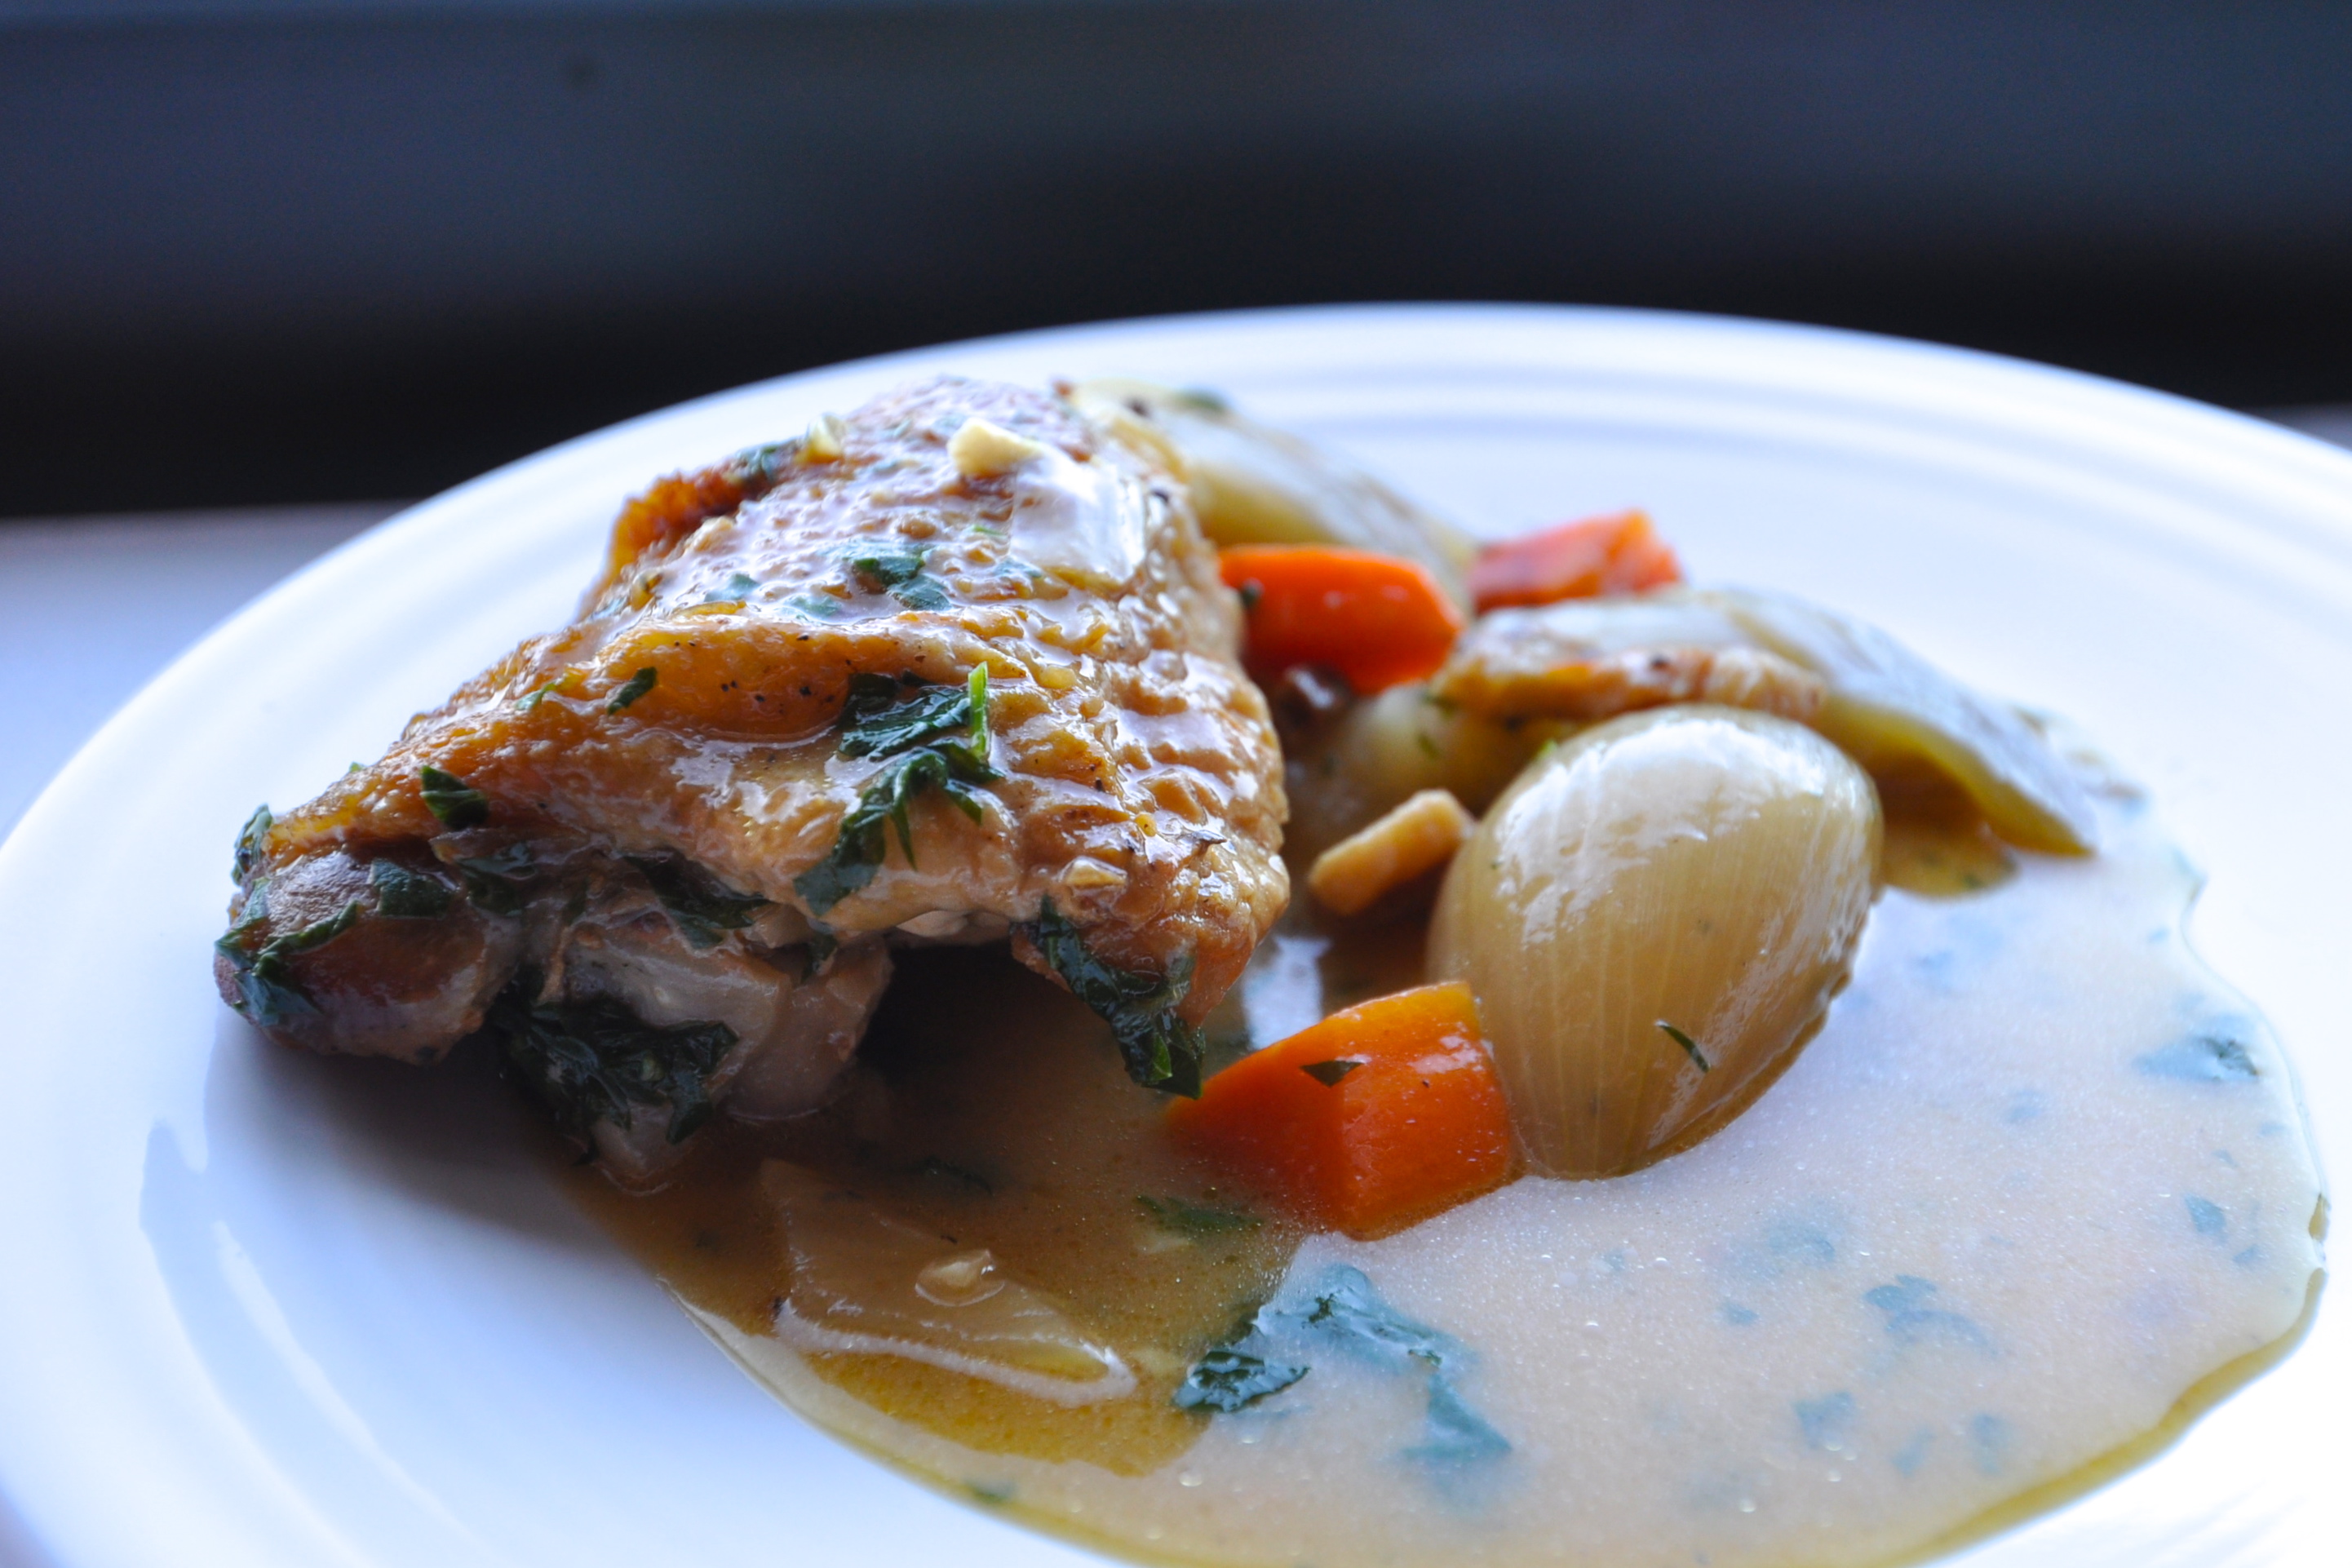
One recent dish that did wonders to take the edge off  my flu-inspired self-pity, fatigue and aches and pains was a braised wonder of moist chicken thighs slow-cooked in white wine with plenty of sweet shallots. In addition to its buttery, subtly savory flavor when cooked down, shallots are packed with potent flu fighting agents. Less pungent than onions, although of the same family, and resembling garlic with its bulbous cloves, the shallot is a powerhouse of flavonoids, chemicals that function as antioxidants. Flavonoid-rich foods are just the thing to battle winter ill since they amplify the power of your vitamin C, work to prevent inflammation throughout the body and protects cells from damage.

Health benefits aside, this appetite-pleaser is just downright delicious and bound to perk up any bed-ridden invalid.

DSC_0419

Chicken Braised with Shallots and White Wine
(Adapted from Fine Cooking)

Olive oil, as required
8 bone-in, skin-on chicken thighs
Salt and freshly ground black pepper
1/2 lb. thick cut sliced bacon or pancetta, diced
8 medium shallots, peeled and halved
2 large carrots, peeled, halved and sliced into crescents
1 small bulb fennel, trimmed, cored, and diced
2 cloves garlic, minced
Small handful sprigs of  fresh parsley
1 bay leaf
1/2 cups dry fruity white wine, I used Riesling
3 cups l chicken broth
1 Tbs apple cider vinegar
2 heaped Tbs creme fraiche
2 Tbs. chopped fresh parsley

Dry the chicken thighs well with paper towels and season all over with salt and pepper.  Heat 2 Tbs. of olive oil in a large Dutch oven over medium high heat. When very hot, place the chicken pieces, skin side down, in the pot in a single layer. Cook, without moving the chicken, until the skin is a deep, burnished golden brown about  8 to 10 minutes. Turn over the chicken and cook for a further  4 to 5 minutes until the underside is also golden. Transfer to a plate.

Pour off and discard any excess fat from the pot leaving behind about 1 Tbs.  Add the bacon or pancetta to the pot until  and cook until well browned all over, 5 to 8 minutes. Using a slotted spoon, transfer to a bowl lined with paper towels and leave to drain and crisp up.

Pour off and discard the fat.

Add 2 Tbs olive oil to the pot and when hot, add the shallots, carrots, and fennel. Cook, stirring every now and then scraping the bottom of the pot to loosen any stuck -on brown bits, until  the vegetables are tender and browned in places, about 6 to 8 minutes. Stir in the garlic and cook for a further 1 to 2 minutes.

Place the parsley springs and bay leaf in a piece of cheese cloth and tie up to form a small parcel, or tie up in a bundle using butcher’s twine. Place the herb bundle or parcel to the pot, and pour in the wine and the chicken broth. Bring to the boil and simmer briskly. Return the chicken and the pancetta to the pot,pushing the chicken down so that it is covered by the broth as much as possible. Bring back to the boil, then reduce the heat to low, cover, and simmer very gently for 50 minutes to an hour until the chicken is falling off the bone tender.

Fish out the herbs and discard. Using a ladle, remove as much of the broth as you can from the pot and transfer to a small saucepan. Place the saucepan over high heat and simmer the broth briskly until reduced by half.  Lower the heat, and stir in the apple cider vinegar and creme fraiche. When the sauce is completely smooth, taste and season with salt and pepper then remove from the heat. Pour the sauce over the chicken and vegetables still in the pot, sprinkle over the chopped parsley and stir well. Serve with hot, lightly buttered wide egg noodles.


By Charity Shumway |

Grow Yourself Some Gorgeous Onions

onions(image)

I think onions are the best part of a many a winter meal. Slow cooked and caramelized with a pot roast, all soft and soaked with juices. Crisped over green beans, a crunch of sweet and savor. And then there’s french onion soup, maybe the pinnacle of winter comfort.

You can buy bags of onions at the store for pretty darn cheap, so if you’re going to grow them on your own it’s not to save a buck. And it’s not really because they’re pretty either. They can flower, of course, but it’s a sign of panic at unfavorable conditions (typically hot temperatures) and best met with immediate trimming to keep the underground onion bulb growing. And aside from the flower you really have nothing but unlovely greens at wide intervals. So why grow them then? Because you can, is one reason. They’re not that hard, and there’s the simple satisfaction of it. But another reason is variety. At the store you can buy yellow or white or red onions. If you’re growing your own, you have options like Pearl Drops, Ebenezers, or Red Zeppelins, to name just a few — infinitely more charming.

If you decide to go for it, there are three important things you should know.

  • Short Day vs. Long Day. Onions are divided into two major categories: short day and long day. Short day onions form their bulbs (which become the flesh you’ll eat later) when the sun shines about twelve hours a day. Long day onions form their bulbs when the sun shines more like fifteen hours a day. If you live in a wintry state, you’ll need to grow a long day variety, otherwise your onions will form bulbs too early in the season, when the plants are too little to sustain them, and you’ll end up with a piddly diddle kind of crop. So look for that when you’re picking your seeds, not just for a pretty name.
  • A Lengthy Season. Onions need a nice long growing season. If you plant them in March or April, they’ll be ready for a late summer/early fall harvest. And if you’re a procrastinator like me and you think you can put them in a little later and then just harvest them a little later, forget about it. They do their best growing when the weather is cool, so you need to get them in the soil early, so they’ll be the right size when that magical “long day” sunlight comes along.
  • Curing. Unless you plan to eat the onions immediately, you’ll need to cure them, which means leaving them to air dry with their tops on. They need plenty of air circulation and two to three weeks to thoroughly dry. If finding space for onions to dry for weeks on end in your apartment sounds a bit nuts, revert back to that first sentence about eating them immediately — not such a bad idea!

Other than that, onions like what most vegetables like. Water, sun, and nice, fertile soil. Plant them early, then watch and wait. I’m rabbit-earing the shallot pages in my seed catalogs this winter!

By Nadia Arumugam |

Curry Spiced Pumpkin And Coconut Soup For A Rainy Day

DSC_0364

Following on from Charity’s post on small-space-friendly pumpkins, I had planned to whip up something exciting and adventurous with a perfectly formed and almost-too-cute to eat pie pumpkin I was lucky enough to land. (Full disclosure, I bought it at Dean & DeLuca as I am sadly lacking in home-grown harvest. )  Most of the giant orange orbs you find around Halloween and Thanksgiving tend to be field pumpkins intended to add festive decor to the holiday table  or frighten little gouls on your doorstep rather than to be eaten as part of a celebratory meal.

So with my rare, edible pumpkin in hand, I contemplated such delights as a pumpkin meringue pie, chipotle spiced pumpkin biscuits and even pumpkin buttermilk pancakes. Alas, I awoke today to find lower Manhattan miserably engulfed in dense, unforgiving fog and a pitiful mist of rain. This was no time for novelty. This was time for old fashioned comfort. And so I soothed my culinary id and began my preparations for pumpkin soup. Of course, while soup is comfort food, it can still be adventurous. With these two principles in mind, my Curry Spiced Roasted Pumpkin and Coconut Soup came to be.

Curry Spiced Roasted Pumpkin and Coconut Soup
Serves 2 to 4

Before you even think about taking a pumpkin into the kitchen, make sure it’s the eating kind. Pumpkins meant for decoration tend to be stringy, tasteless and full of water. Try and find Pie Pumpkins if you can. As the name aptly suggests, this variety has smooth, creamy flesh that delivers delicious pie as well as a whole host of other tasty dishes.

This recipe makes a robustly flavored soup bursting with aromatic, pungent Indian spices. If you prefer your soups more mellow, feel free to cut down on the spice or add more coconut milk which will render a creamier, milder concoction. Garam masala is a heady Indian spice blend that’s called for among the ingredients. It’s found in the spice or ethnic sections of most larger grocery stores and supermarkets. If you can’t get hold of it, use a mild curry powder instead.

DSC_0358

DSC_0354


For the Roast Pumpkin
½ tsp paprika
½ tsp ground turmeric
½ tsp ground fennel
1 small Pie Pumpkin (or other edible variety), about 2 ½lb, seeded and cut into 8 wedges (Keep the pumpkin seeds to garnish, if desired)|
Salt and freshly ground black pepper
Olive oil

For the Soup Base
2 Tbs olive oil
1 medium onion, chopped
Salt
2 small cloves garlic, minced
1 tsp finely grated peeled fresh ginger
½ tsp garam masala
½ tsp ground cumin
½ tsp ground coriander
¼ tsp ground cayenne
2 cups just-boiled chicken broth
Freshly ground black pepper
3/4 cup unsweetened coconut milk
2 cups just-boiled water
¼ cup soft brown sugar
1 ½ Tbs apple cider vinegar
2 Tbs finely minced fresh cilantro leaves

Preheat the oven to 420F.

Combine all the spices for the roast pumpkin in a small bowl. Place the pumpkin on a rimmed baking sheet and sprinkle the spice mix evenly over all the wedges. Drizzle generously with olive oil, and season with salt and pepper. Roast for 50 minutes to an hour, until the pumpkin is fork tender.

When the pumpkin is cooked, remove from the oven. When cool enough to handle, skin the pumpkin. Slide a sharp paring knife between the skin and the flesh of a pumpkin wedge at one end then draw the knife all the way along the bottom of the wedge to the other end. You should end up with a thin layer of skin and a crescent of flesh. Repeat with the remaining wedges and discard the skin. Roughly chop the pumpkin flesh and set aside.

To make the soup base, heat the 2 Tbs olive oil in a medium heavy-based saucepan over medium high heat. When hot, add the onion with a pinch of salt. Cook for 3 to 4 minutes, stirring, until the onion is translucent, tender and slightly golden. Add the  garlic and ginger and cook, stirring for a further 2 minutes. Add all the spices and stir to combine. Cook for one minute until fragrant then toss in the chopped pumpkin. Cook for 2 minutes mixing and crushing the pumpkin to coat in the spice and onion mixture.

Add the hot chicken broth, and bring up to the boil. Season generously with salt and pepper. Lower the heat to medium low and simmer for 10 to 15 mins.

Remove from the heat, and leave to cool for about 5 minutes. Using a blender or a hand held blender, blitz the pumpkin and broth mixture until completely. Return the soup to the saucepan, if necessary, and place over a medium heat. Add the coconut milk, hot water, brown sugar and vinegar. Bring the soup up to the boil and simmer for about 6 to 8 minutes. Taste and add more salt and pepper if necessary and thin the soup with more just-boiled water, if necessary. Stir in the cilantro, and remove from the heat. Serve in small bowls  or mugs (this soup is rich!) garnished with toasted pumpkin seeds, if desired, and accompanied with warm flatbread or naan bread

Toasted Pumpkin Seeds to Garnish: Reserve about ⅓ cup pumpkin seeds. Discard any stringy fibers from the seeds, then wash and dry using paper towels. In a small bowl, toss the seeds with ¼ tsp canola oil. Then, add generous pinches of ground cumin, paprika, fine sea salt and two generous pinches of granulated white sugar. Mix well and transfer to a baking sheet and roast in a 360F oven for about 12 minutes until toasted and a deep golden brown color.

By Charity Shumway |

Your Own Little Pumpkin Patch

Cinderella Pumpkin

(image)

I recently attended the Utah State Fair, where I posed for pictures with a six hundred pound pumpkin (I also posed with several goats and some blue ribbon dahlias, as one does). Unfortunately, growing a 600 pound pumpkin on my terrace would violate the terms of my lease. Probably yours too. Fortunately, there are a number of smaller pumpkins I’d be just as happy to be associated with.There are three particular varieties that will be vying for a place in my winter seed order.

Rouge Vif d’Etampes. That’s the beauty in the photo above. The fancy french name is appealing, and the flesh is perfectly edible, but the real reason to grow this type of pumpkin is for its fairy tale good looks. The scarlet orange just sings.  When I walk around and see Rouge Vif d’Etampes pumpkins decorating the steps of brownstones this time of year, I explode with covetousness.

Baby Boo

(image)

Baby Boo. These ghostly little darlings would not be for eating, just for decor, but I find them irresistible nonetheless. I was just at an amazing wedding in the Berkshires, 100% beautiful fall perfection, and the table escort cards were tied to Baby Boos.  You sort of just wanted to steal them all. In addition to looking great on a table/mantle/shelf/anywhere, you know where else these pumpkins would look great? Growing in a garden. Bright green vine-y tendrils next to luminescent spots of white. Just lovely.

New England Pie Pumpkin

(image)

New England Pie Pumpkins. The word “pie” in the name is a real giveaway of my motivations here, but I also have to say if there’s a region I would like my pie pumpkin to be from, it’s the region of the pilgrims. What’s more, these sweet little pumpkins grow to be between two and five pounds, perfect for a city garden. And unlike larger jack-o-lantern pumpkins, the flesh isn’t stringy. Just nice and smooth and creamy.

Why fight it? I think I’m just going to order all of them. If you’re tempted to join me in pumpkin growing next year, here are the three big things you need to know.

  1. Pumpkins are a warm season vegetable. That means you need to plant the seeds fairly late, after all danger of frost has passed. So May or so if you live in a cool climate. They’ll then spend all summer growing and be ready just in time for autumn splendor.
  2. They need their space. Pumpkins are in the Cucurbita family, along with other vining plants like cucumbers and watermelons. And as with their cousins, the plants themselves can get large very quickly, even if you’re growing a small variety. To accommodate, you’ll want to space the seeds ten to twelve inches apart, and once you have pumpkins on the vine, you’ll want to thin them (aka remove a fledgling pumpkin or two) so each pumpkin is about two feet apart.
  3. Don’t panic if you don’t see pumpkins right away. The first flowers on pumpkin vines are always male, and they don’t produce fruit. Their job is just to attract bees, who will then hang around and pollinate the next round of flowers, which are the ones that lead to all those pretty pumpkins. So be patient.